
Here is an experiment that I did with the new Match Color function in Photoshop CS3. The basic technique is really easy, deceptively easy…the real work begins after the buttons are pushed, and I’m still tweaking my pictures!
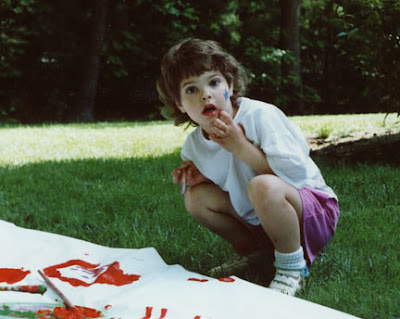
1. Open the image that you want to work on and an image that you’ll use as a color source in Photoshop. Make sure that the image you’re going to doctor up is on top and selected.
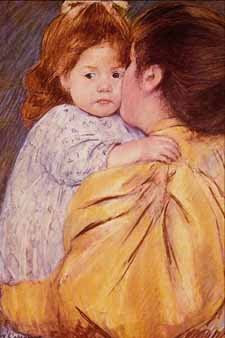
2. Click on Image –> Adjustments –> Match Color. Chose the second picture as your source (the drop down box is near the bottom). You’ll be able to see immediately how the palette selection will alter your working image.
3. Play with the luminance, color intensity, and fade sliders until you are satisfied.

4. Now the real work begins! If you really want your image to resemble the artist whose source material you’ve chosen, it’s now time to start working on the style. I began with using the Paint Daubs filter. These pieces aren’t anywhere near finished since they were just for practice. I’d have to do a lot more work to bring some of the detail around her face (her eyes especially) back. I’ve almost lost the star on her cheek completely. But this is sufficient to show you the general principle of the thing!
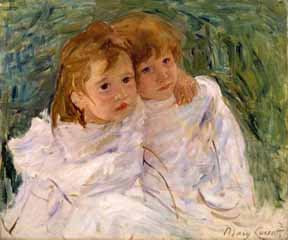
I didn’t like the results from the first source picture that I chose, so I tried the same process with another one. I thought the warmer tones from this trial suited the Mary Cassatt style much better, but I suppose it’s really personal preference:
Technorati Tags:mixed media,collage,assemblage,digital art,photography,altered books,art journals


1. Open the image that you want to work on and an image that you’ll use as a color source in Photoshop. Make sure that the image you’re going to doctor up is on top and selected.
2. Click on Image –> Adjustments –> Match Color. Chose the second picture as your source (the drop down box is near the bottom). You’ll be able to see immediately how the palette selection will alter your working image.
3. Play with the luminance, color intensity, and fade sliders until you are satisfied.

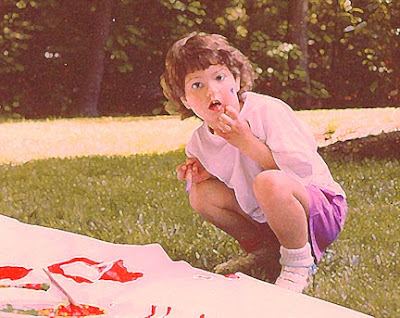
4. Now the real work begins! If you really want your image to resemble the artist whose source material you’ve chosen, it’s now time to start working on the style. I began with using the Paint Daubs filter. These pieces aren’t anywhere near finished since they were just for practice. I’d have to do a lot more work to bring some of the detail around her face (her eyes especially) back. I’ve almost lost the star on her cheek completely. But this is sufficient to show you the general principle of the thing!
I didn’t like the results from the first source picture that I chose, so I tried the same process with another one. I thought the warmer tones from this trial suited the Mary Cassatt style much better, but I suppose it’s really personal preference:


Copyright 2007 Cyndi Lavin. Not to be reprinted, resold, or redistributed for profit. May be printed out for personal use or distributed electronically provided that entire file, including this notice, remains intact.
Technorati Tags:mixed media,collage,assemblage,digital art,photography,altered books,art journals
Comments