
A gradient fill can be used on just part of a photo (to beef up a wimpy sky, for example) or on the entire image. It can be used to correct or change lighting, and can also add a great stylized look to the colors. Changing the colors is not a technique that I’d recommend using on every shot just because it looks cool, however. It’s like every other trick with Photoshop that can become very boring very fast. I like to play around with it only when I’ve got a shot with great lines but not much else!
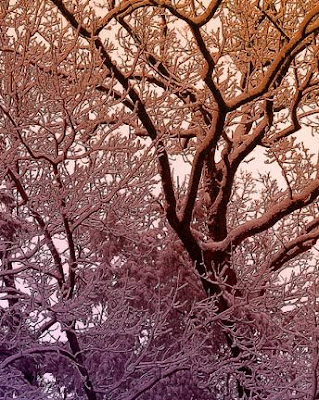
1. Open your image file, size it, and save it under a new name. Make copy of background layer.
2. Up the contrast and desaturate slightly if needed. You want a high-contrast, dull colored image to work with.
3. Using an adjustment layer, add the gradient fill of your choice in an orientation that suits the light of your image. Choose the color blending mode and adjust the opacity to suit.
4. Merge all visible layers into a new layer, and use this layer to add any filter effects you desire, such as brush strokes or palette knife.
5. Create an embossed layer and add it in overlay mode, adjusting the opacity. I wrote a short tutorial on adding an embossed layer here.
Technorati Tags:mixed media,collage,assemblage,digital art,photography,altered books,art journals

1. Open your image file, size it, and save it under a new name. Make copy of background layer.
2. Up the contrast and desaturate slightly if needed. You want a high-contrast, dull colored image to work with.
3. Using an adjustment layer, add the gradient fill of your choice in an orientation that suits the light of your image. Choose the color blending mode and adjust the opacity to suit.
4. Merge all visible layers into a new layer, and use this layer to add any filter effects you desire, such as brush strokes or palette knife.
5. Create an embossed layer and add it in overlay mode, adjusting the opacity. I wrote a short tutorial on adding an embossed layer here.
Copyright 2007 Cyndi Lavin. Not to be reprinted, resold, or redistributed for profit. May be printed out for personal use or distributed electronically provided that entire file, including this notice, remains intact.
Technorati Tags:mixed media,collage,assemblage,digital art,photography,altered books,art journals
Comments