
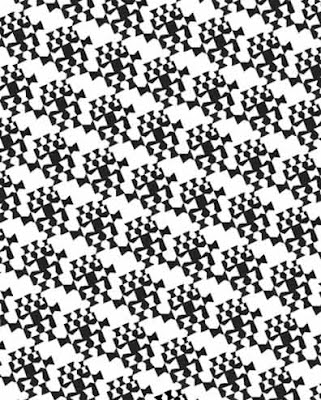
Photoshop "stamps" are really easy to make. You’re actually using the Brush Tool, but instead of dragging it to paint with, you merely click it in place and your image is stamped onto the background. You can change the color of “ink” that you use, fool around with the opacity and blending mode, anything that you’d normally do in Photoshop.
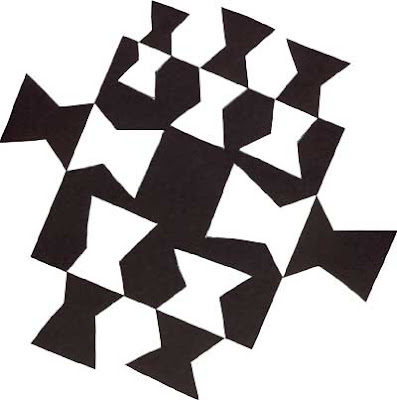
After I cut out my expanded square with an exacto knife, I mounted all the pieces onto white cardstock. Then I scanned it.
So here’s how you can turn your scan into a Photoshop brush in 3 easy steps:
1. In the layers palette, double click on the background layer and rename it to layer 0.
2. Use the Magic Wand Tool to select the white background and delete it. Don’t forget about any white parts that are inside the square.
3. Go to Edit —> Define brush
That’s it! Give it a name and start playing with it. Try painting with it too…you never know. I suggest saving your file in a folder outside of Photoshop as well. When you do upgrades, you don’t want to lose all the brushes that you’ve created!
Technorati Tags:mixed media,collage,assemblage,digital art,photography,altered books,art journals
After I cut out my expanded square with an exacto knife, I mounted all the pieces onto white cardstock. Then I scanned it.

So here’s how you can turn your scan into a Photoshop brush in 3 easy steps:
1. In the layers palette, double click on the background layer and rename it to layer 0.
2. Use the Magic Wand Tool to select the white background and delete it. Don’t forget about any white parts that are inside the square.
3. Go to Edit —> Define brush
That’s it! Give it a name and start playing with it. Try painting with it too…you never know. I suggest saving your file in a folder outside of Photoshop as well. When you do upgrades, you don’t want to lose all the brushes that you’ve created!

Copyright 2007 Cyndi Lavin. Not to be reprinted, resold, or redistributed for profit. May be printed out for personal use or distributed electronically provided that entire file, including this notice, remains intact.
Technorati Tags:mixed media,collage,assemblage,digital art,photography,altered books,art journals
Comments