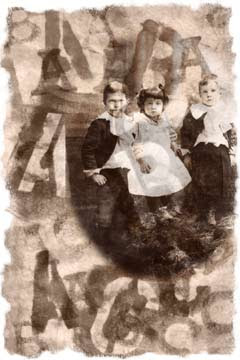
With Photoshop or other image-altering software, you can easily change the color of a background piece that you’ve made. This raises all kinds of interesting possibilities for digital mixed media work. One of my favorite techniques, which you’ve seen many times now, is to collage or paint a background, scan it, and then add digital elements to it. Even when I end up using the actual background piece in a physical art project, I’ve still got the scan to use as many times as I wish.
There are many ways to achieve the same effect in Photoshop, so I’ll explain one easy method for altering the color of your scanned background. I'm going to use Francis, Walter, and Grace, shown above, as an example.
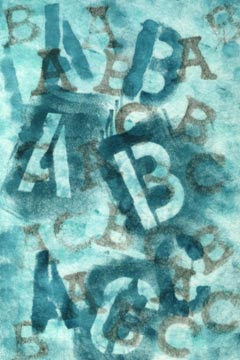
1. This is a piece of Lutradur which I painted with acrylics, stenciled, and stamped with black ink. Lutradur is a non-woven polyester fabric used in the automotive industry. It’s incredibly tough and stiff but has a soft surface. It can be melted to create wonderful organic shapes or to have uneven edges.
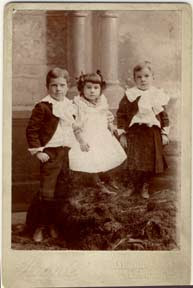
2. I scanned a vintage cabinet card of three children that I wanted to use with the lutradur background. Using the “color pick” tool, I chose a medium-light sepia from the card.
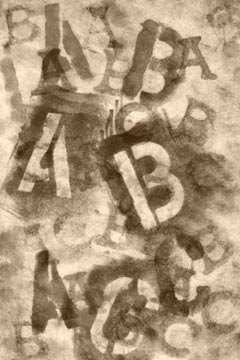
3. Create an empty layer in the layers palette above your scanned background. Use the fill tool to color it with the hue that you picked from the cabinet card. The new layer will obscure your background completely, but when you reset the blending mode to “color”, the original background shows through in its new color pattern. Another easy way to alter the color is through the “colorize” option in the “hue/saturation” box, but I prefer this extra layer so that adjustments may be made directly to the color without affecting the image beneath.
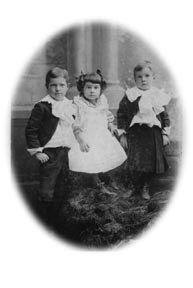
4. Make an oval vignette from the cabinet card image and desaturate it. Resize it as needed, and drag it to the scanned background.

5. Experiment with blending modes to get the look you want. Most of the time I use either the “overlay” or “hard light” mode. For this piece, I made a double layer of the children, reducing the opacity of the top layer to 30%. I also filled the top layer with the same color picked in step 2.
6. Tweak the image as needed, blending edges between the images. Use layer masks as needed. For a final step, I used the “eraser” tool around the edges and placed the image on a white canvas background.
Copyright 2007 Cyndi Lavin. Not to be reprinted, resold, or redistributed for profit. May be printed out for personal use or distributed electronically provided that entire file, including this notice, remains intact.
Technorati Tags:mixed media,collage,assemblage,digital art,photography,altered books,art journals

Comments